Why Mold Forms on Refrigerator Door Gaskets
Mold grows on refrigerator door gaskets because warm, humid air hits the cold rubber seal every time you open the door. Condensation forms, and crumbs, dust, or spills settle inside the folds. That damp, dark, nutrient-rich crevice is exactly where mold spores multiply.
The gasket is not just a trim piece. It keeps cold air in and outside air out. When the seal is dirty, it cannot close as tightly, and the compressor works harder to hold the set temperature. That wastes energy and raises the chance of spoilage.
Signs Your Gasket Needs Cleaning vs. Replacement
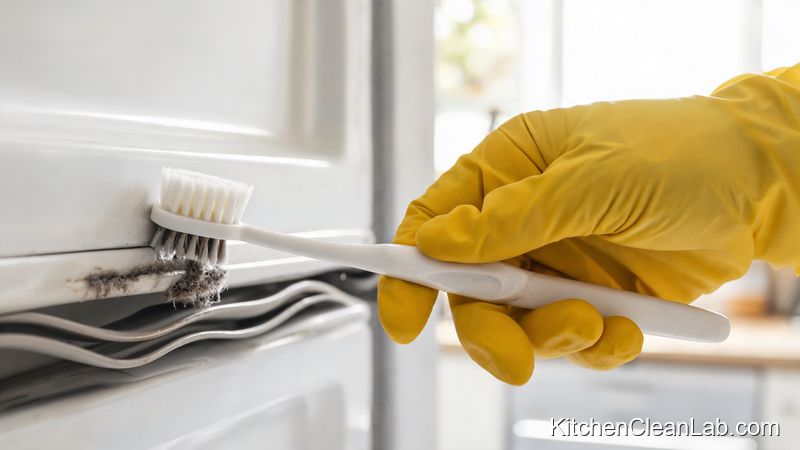
If the gasket is still flexible, attached all the way around, and free of deep cracks, cleaning is usually safe. If the rubber is brittle, cracked, warped, or the door does not close tightly, replacement is the only lasting fix.
- Cleaning is enough when: you see gray, black, or fuzzy patches but the rubber still springs back, the door passes the dollar bill test, and there are no splits.
- Replacement is needed when: the gasket is brittle or cracked, sags away from the frame, allows condensation or frost around the door, or fails the dollar bill test after cleaning.
Safe Cleaning Solutions for Rubber Door Gaskets
Use a cleaner that lifts mold without drying the rubber. Start with the gentlest option, and keep all liquids out of the gasket folds as much as possible.
| Cleaner | How to Use It | Best For | Caution |
|---|---|---|---|
| Mild dish soap and warm water | 1-2 drops in 1 quart warm water | Weekly wipedowns and light residue | Use soft cloth only; do not over-wet |
| White vinegar and warm water | 1:1 ratio in a spray bottle | Surface mold, odor, general cleaning | Never mix with bleach |
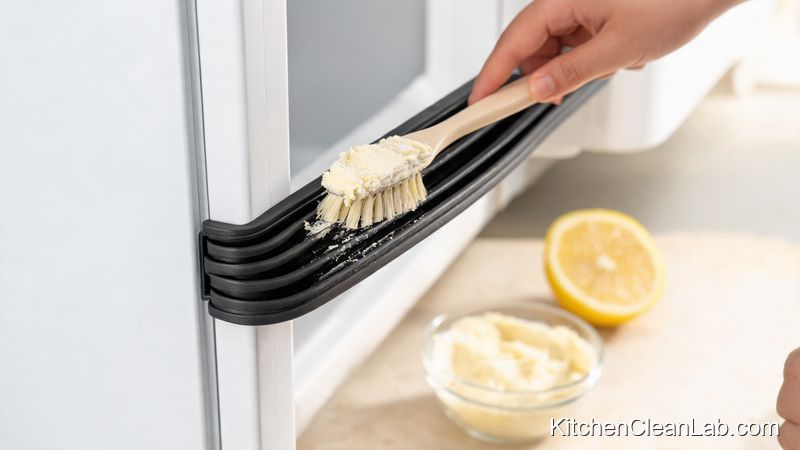
| Baking soda paste | Mix baking soda, lemon juice, and water into a thick paste | Stubborn black mold in grooves | Let paste sit for 2 minutes; use gentle strokes |
| Hydrogen peroxide | Use 3% solution as a pre-treatment mist | Mold in deep folds and corners | Wait 5-10 minutes, then wipe before cleaning |
Safety note: Wear nitrile gloves and open a window or turn on the range hood if you use vinegar or hydrogen peroxide. Never mix bleach with vinegar, ammonia, or other cleaning products.
Step-by-Step Guide to Remove Mold from Refrigerator Door Gaskets
Work methodically through the folds, and never scrape with metal. If you unplug the refrigerator, keep dairy, meat, and other perishables in a cooler or finish within the safe time window: no more than 2 hours above 40°F, or 1 hour above 90°F.
- Unplug the refrigerator and open the door fully. This prevents electrical risk and gives you a clear view of the creases.
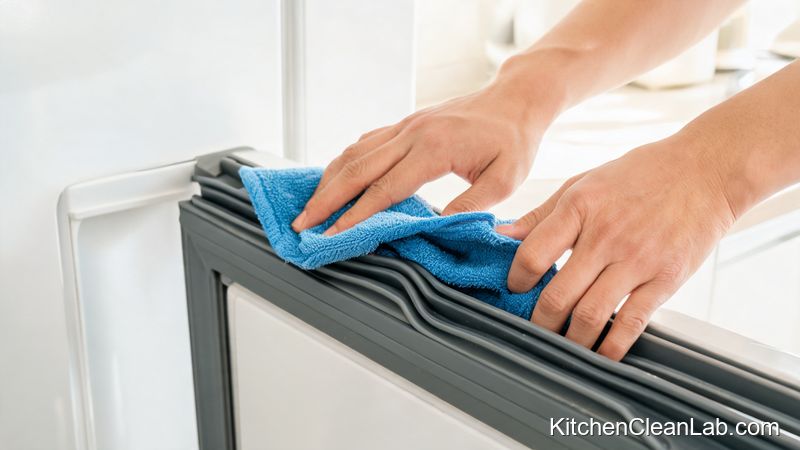
- Remove loose debris. Wipe the entire gasket with a dry or barely damp microfiber cloth. This keeps cleaning solutions from turning loose crumbs into abrasive paste.
- Optional: Pre-treat visible mold. Mist 3% hydrogen peroxide lightly over the affected folds, wait 5-10 minutes, and wipe with a paper towel. Do not soak the rubber.
- Choose and apply your cleaning solution. A solution of 1 quart warm water plus 1 tablespoon baking soda works well. A 1:1 mix of white vinegar and warm water is also effective. Spray the solution onto the cloth or soft toothbrush, not directly into the gasket.
- Gently scrub each fold. Use a soft toothbrush or cotton swab to work along inner and outer lips, corners, and the bottom section where moisture settles. Use light pressure so you do not bend, compress, or scratch the rubber.
- Treat stubborn patches with a baking soda paste. Mix baking soda, lemon juice, and water into a paste. Lay a towel under the door, apply the paste to moldy areas, wait 2 minutes, then gently scrub. The paste will form small balls that fall onto the towel.
- Wipe away cleaner and loosened residue. Use a clean damp microfiber cloth to remove all solution, mold, and paste. Rinse the cloth often to avoid spreading spores.
- Dry every fold thoroughly. Press a dry microfiber cloth into the corners and creases. Leftover moisture is the exact condition mold needs to return.
- Optional: Condition the rubber. Apply a very thin coat of petroleum jelly with a clean cloth to keep the gasket supple. Wipe off any excess so food particles do not stick.
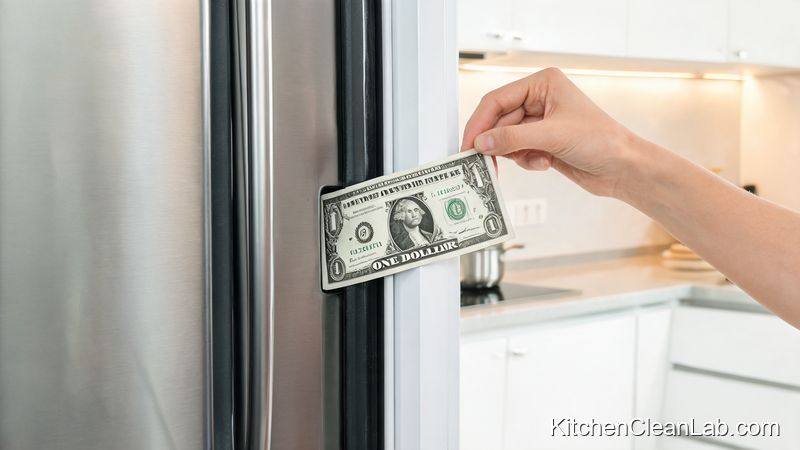
- Restore power and test the seal. Let the fridge run for 10-15 minutes, then place a dollar bill between the door and frame. Close the door and pull gently. It should drag. If it slides out easily, the gasket may need replacement.
How to Keep Mold from Coming Back
Prevention is about reducing moisture and removing food residue weekly. A clean gasket that stays dry will not support mold growth, even in a humid kitchen.
- Wipe the gasket every week. Use a damp microfiber cloth followed by a dry cloth. Focus on folds and lower corners.
- Clean spills immediately. If juice, milk, or condensation drips onto the seal, wipe and dry it the same day.
- Cover food and liquids. Store leftovers in sealed containers to prevent spills from reaching the door.
- Do not overpack the refrigerator. Airflow keeps temperatures even and reduces condensation along the door edges.
- Check the door hinges and leveling. A sagging door breaks the seal and lets humid air inside. Adjust hinges or leveling feet as needed.
- Run the dollar bill test monthly. Weak resistance around the door means the seal is failing, even if it looks clean.
Common Mistakes That Damage Refrigerator Gaskets
A ruined gasket usually comes from a harsh cleaning method, not the mold itself. Protect the rubber by avoiding these mistakes.
- Bleach or ammonia: They dry out the rubber and can lead to cracks and leaks. Use only cleaners known to be rubber-safe unless the manual says otherwise.
- Mixing bleach and vinegar: This creates toxic chlorine gas. Never mix cleaning products.
- Scraping with a knife, screwdriver, or metal pick: A puncture breaks the airtight seal immediately and may not be visible.
- Soaking the gasket: Excess liquid can seep behind the seal, creating hidden mold and odor inside the door assembly.
- Ignoring a loose seal: Cleaning cannot fix a gasket that no longer presses tightly against the frame. A failed seal lets warm air in and increases energy bills.
FAQ: Refrigerator Gasket Mold Removal
Can I use bleach to remove mold from a refrigerator door gasket?
Avoid bleach unless the manufacturer's manual explicitly allows it. Bleach can dry out rubber and cause cracking or loss of flexibility. Use vinegar, baking soda, or hydrogen peroxide as gentler alternatives, and never mix bleach with vinegar.
How do I know if the mold is inside the gasket or just on the surface?
After cleaning and drying the folds, check whether dark staining remains deep inside the rubber or the seal feels spongy or cracked. If odor or black spots return shortly after a thorough cleaning, the mold may have penetrated the rubber, and replacement is the safer fix.
What is the fastest way to clean a fridge door seal without damaging it?
The fastest safe method is to wipe loose debris away, apply a 1:1 vinegar and warm water solution with a soft toothbrush, scrub gently, wipe clean, and dry completely. For heavier mold, add a hydrogen peroxide pre-treatment or a baking soda paste, but never use sharp tools.
When should I replace a refrigerator door gasket instead of cleaning it?
Replace the gasket when the rubber is brittle, cracked, warped, detached, or fails the dollar bill test after cleaning. A gasket that does not create a consistent, tight seal allows warm air inside, which makes the compressor run harder and can cause spoilage.
Final Check: Seal Integrity and Replacement
After cleaning and drying, check whether the door closes evenly and the gasket makes firm contact with the frame. Run the dollar bill test in several places around the door, especially near the top, bottom, and hinge side.
If the gasket grips the bill, stays flexible, and shows no cracks, the cleaning is complete. Keep up with weekly wipedowns. If the seal is cracked, warped, detached, or still smelly after a thorough clean, replace it with a model-specific gasket. A clean, intact gasket protects food quality, lowers compressor workload, and stops mold from returning.