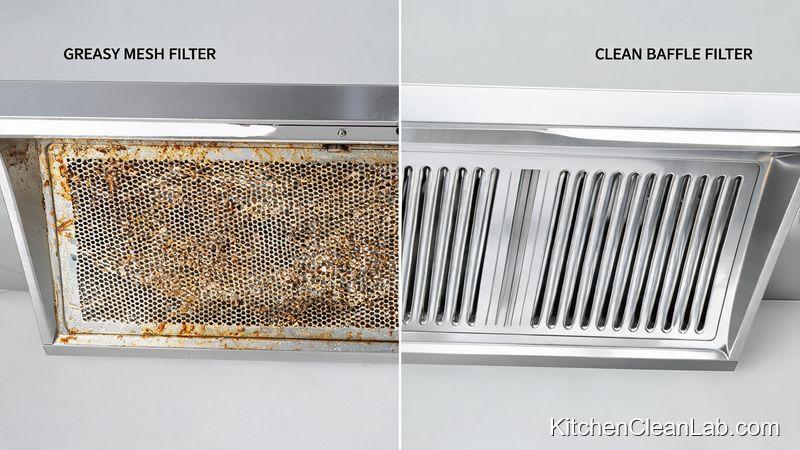
Why Your Air Fryer Still Smells Greasy After a Quick Wash
You wipe the basket, scrub the crisper plate, and maybe run a damp cloth over the drawer. Yet the next time you cook, your kitchen fills with smoke or a faint rancid odor. That happens because air fryers have several hidden places where grease, food particles, and carbonized oil collect. Because hot air circulates at high speed, tiny droplets of oil are carried into corners you never see during a routine wash.
The result is not just bad smells. Over time, hidden buildup can reduce airflow, make food less crispy, and even create unhealthy compounds when old grease is reheated. The fix is not difficult, but you need to know exactly where to look. Use this guide to deep clean the seven most overlooked spots in your air fryer and restore fresh, crisp results.
1. The Heating Element and Upper Ceiling
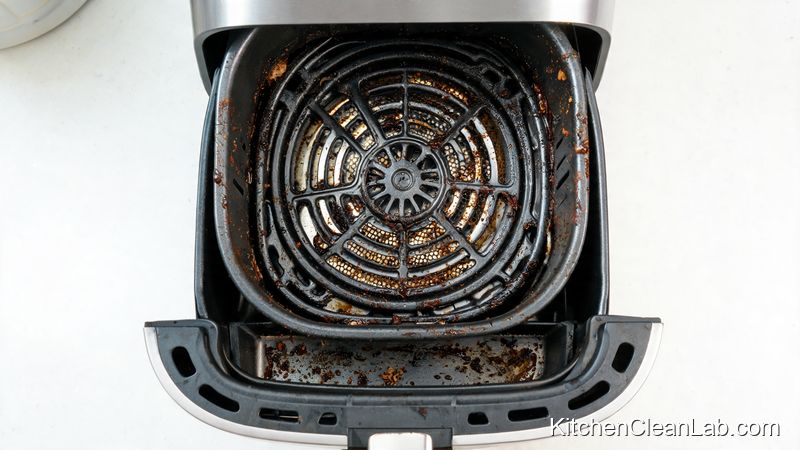
Most people never look up inside the air fryer. The heating element sits above the basket and is directly exposed to spattering oil. When you cook marinated meats, chicken wings, or anything with fat, tiny grease particles are thrown upward by the fan. These particles bake onto the coil and the surrounding metal ceiling.
Signs of buildup include white or blue smoke during preheating, a burnt smell, and longer cooking times. This is also a fire risk if the residue gets thick enough.
How to Clean the Heating Element Safely
- Unplug the appliance and let it cool completely.
- Turn the air fryer upside down over a sink or place a towel under it.
- Use a soft-bristled brush or a dry microfiber cloth to loosen dry food particles from the coils.
- Dampen a non-abrasive sponge with warm water and a small amount of dish soap. Wring it out until it is almost dry.
- Wipe the metal ceiling and the coils gently. Do not let water drip into the electrical housing.
- For stubborn grease, use a paste of baking soda and water. Apply with a soft toothbrush, scrub lightly, then wipe with a clean damp cloth.
- Dry completely and run the air fryer empty for 3–5 minutes to evaporate moisture.
Never use oven cleaner or metal scouring pads on the heating element. Harsh chemicals can leave toxic fumes, and abrasive tools can damage the coil coating.
2. The Fan Guard and Air Intake Vents
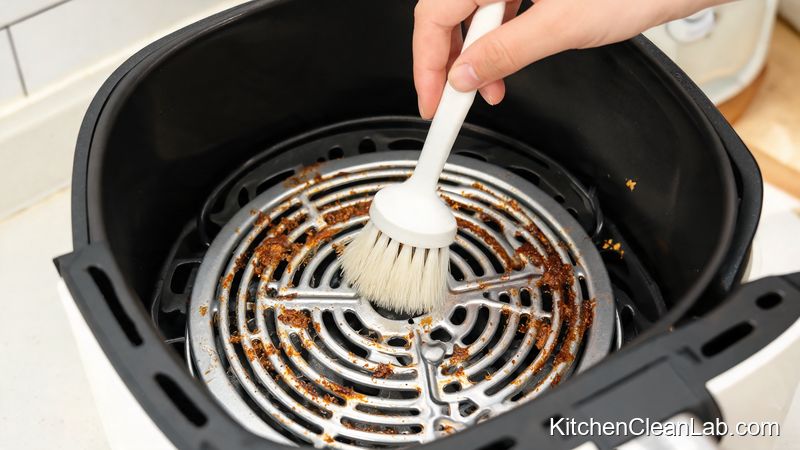
The fan sits behind a metal guard above or behind the basket. It pulls air in and pushes it around the food. Over time, a sticky film of oil and dust clogs the guard and reduces airflow. This is one of the most common reasons food turns out soft instead of crisp.
Because the fan guard is often hidden behind the heating element, it is easy to miss. A thin layer of grease mixed with airborne dust creates a stubborn coating that normal wiping cannot remove.
How to Clean the Fan Guard
- Unplug and cool the air fryer.
- Use a vacuum cleaner with a crevice tool or a dry pastry brush to remove loose debris from the vent openings.
- Spray a microfiber cloth with a solution of equal parts white vinegar and warm water. Do not spray the air fryer directly.
- Wipe the fan guard and surrounding vents. If the guard is removable, check the manual and remove it for deeper cleaning.
- For oily residue, dip a cotton swab in isopropyl alcohol and carefully clean between the grille slots.
- Let it air dry completely before plugging it back in.
3. The Rim and Lip of the Fryer Basket
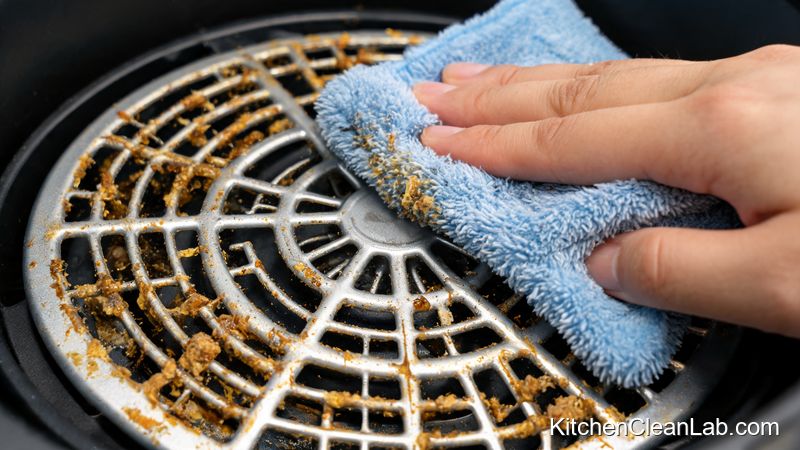
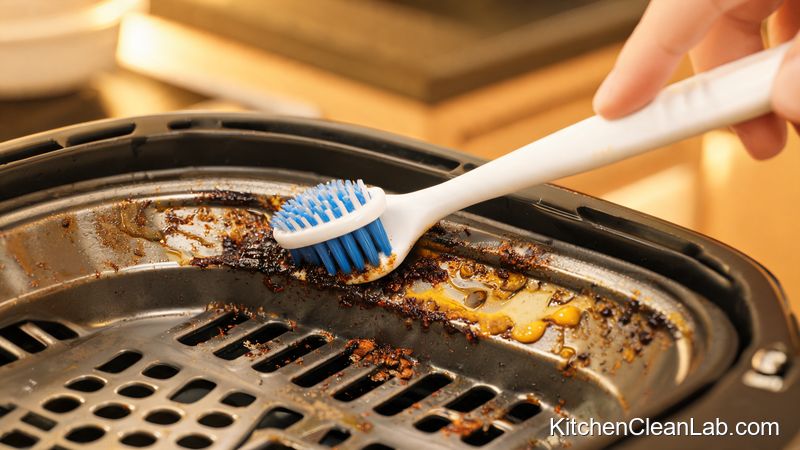
When you pull the basket out, food crumbs and grease collect along the rim where the basket meets the drawer. This seam is hidden when the basket is closed, so it rarely gets scrubbed. The result is a sticky, dark line around the cooking area that can harbor bacteria and produce odors.
The rim is also a spot where wet batters, marinades, and sauces bake on during cooking. Once carbonized, the residue becomes difficult to remove and can flake into food.
How to Clean the Basket Rim and Lip
- Remove the basket and soak it in hot, soapy water for 10–15 minutes.
- Use an old soft toothbrush or a small cleaning brush to scrub the inner rim, outer lip, and drainage grooves.
- Make a paste of baking soda and dish soap for burnt-on stains.
- For tight corners, use a wooden toothpick or a soft-bristle detail brush to dislodge debris.
- Rinse thoroughly and dry with a clean towel.
Do not overlook the slots or tabs where the crisper plate sits. Those small recesses trap oil and crumbs every time you cook.
4. The Crumb Tray or Drip Tray Underneath the Basket
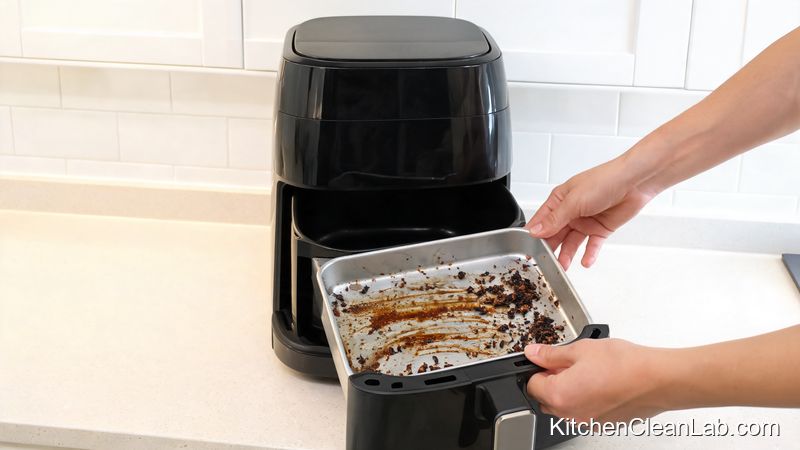
Many air fryers have a removable crumb tray at the bottom, below the basket drawer. Its job is to catch dripping fat and loose crumbs. But because it is hidden below the main drawer, people often forget it until smoke appears. In some models, the tray is at the very base of the cooking chamber and slides out separately.
If you cook fatty foods often, the tray can fill with dark, sticky oil that reheats during every cycle. That is exactly the kind of old grease that can produce unhealthy trans-fatty acids and rancid odors.
How to Clean the Crumb Tray
- Check your manual to see if the tray is removable.
- Slide out the crumb tray and empty loose crumbs into the trash.
- Soak the tray in hot water with a degreasing dish soap for 15 minutes.
- Scrub with a non-scratch sponge or brush.
- For baked-on grease, sprinkle baking soda over the surface, add a few drops of dish soap, and scrub in circular motions.
- Rinse and dry fully before sliding it back.
If your model does not have a removable tray, wipe the bottom interior with a damp soapy cloth, then follow with a clean damp cloth to remove soap residue.
5. The Handle Seam and Basket Hinge Joints
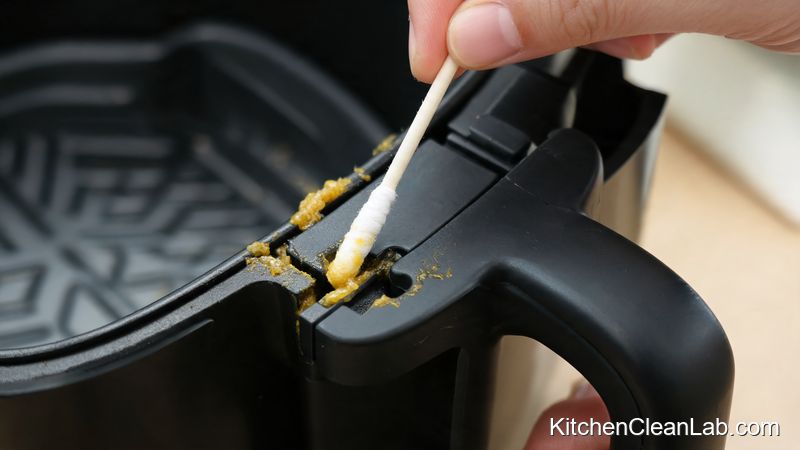
The basket handle feels clean on the outside, but the joint where it attaches to the drawer is a trap. Grease, flour, and sticky sauce drip down the front of the basket and settle into the hinge. Because this area is near the cool exterior, the residue does not always burn off. It becomes a sticky magnet for dust and bacteria.
The same problem occurs around the button that releases the basket from the drawer. Food particles can jam the mechanism and make the handle harder to press over time.
How to Clean the Handle and Hinge Area
- Use a dry toothbrush to remove loose debris around the handle button and hinge.
- Dip a cotton swab in warm, soapy water and clean the seam around the handle attachment.
- Press the basket release button and wipe the exposed track with a damp cloth.
- For sticky residue, use a tiny amount of isopropyl alcohol on a cotton swab. This dissolves oil and evaporates quickly.
- Dry all joints with a paper towel and let the basket sit upside down before reassembling.
6. The Temperature Sensor and Interior Side Walls
The temperature sensor is a small metallic probe inside the cooking chamber. It tells the air fryer when the air has reached the set temperature. Grease vapor can coat the sensor, causing inaccurate readings and uneven cooking. If your air fryer suddenly overcooks or undercooks food, a dirty sensor could be part of the problem.
The interior side walls also collect a fine layer of oil. While they may look clean, a quick wipe with a white paper towel often reveals a yellow-brown film. That film builds up each time you cook and is not removed by washing only the basket.
How to Clean the Sensor and Side Walls
- Unplug the appliance and cool it.
- Wipe the interior walls with a damp microfiber cloth and a small amount of mild dish soap.
- Use a cotton swab moistened with warm water or isopropyl alcohol to clean around the temperature sensor. Be gentle; the sensor is delicate.
- For tough grease, apply a baking soda paste to the walls, leave for 5 minutes, then wipe with a damp cloth.
- Do not allow liquid to enter screw holes, vents, or electrical connections.
7. The Rear Exhaust Vent, Control Panel, and Outer Shell
The outside of the air fryer also matters. The rear exhaust vent releases hot air and steam, so it constantly collects a layer of grease-laden moisture. If you keep the air fryer near a wall or backsplash, that sticky vent can smear grease onto your kitchen surfaces.
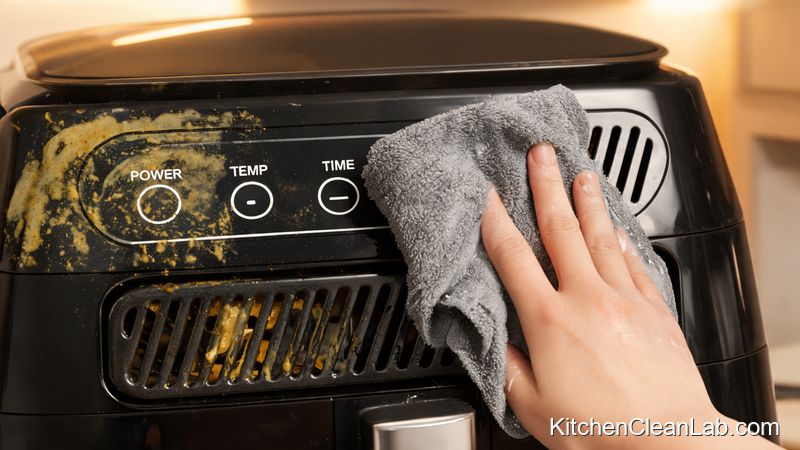
The control panel and buttons are another hidden problem. Oil mist settles on the touchscreen or dials, and over time a sticky film attracts dust. Greasy fingerprints can damage the panel’s surface or affect button sensitivity.
How to Clean the Exterior and Exhaust Vent
- Unplug the appliance and let it cool.
- Wipe the outer shell, control panel, and cord with a damp microfiber cloth and mild dish soap.
- Use a soft brush or vacuum crevice tool on the rear exhaust vent.
- For greasy buttons, use a cotton swab with a little isopropyl alcohol. Do not soak the panel.
- Buff dry with a clean cloth and check that no moisture remains around the plug or power cord.
How to Prevent Hidden Grease Buildup
Deep cleaning is only half the battle. A few simple cooking habits can dramatically reduce the amount of oil that reaches these hidden areas.
- Do not overfill the basket. Overloading blocks airflow and increases splatter. Fill no more than halfway for crispy results.
- Pat food dry before air frying. Excess moisture makes food mushy and sends sticky steam into the fan and heating element.
- Avoid wet batters. They drip through the basket holes and clog the lower tray.
- Never preheat with parchment paper or foil alone. They can fly up and burn on the heating element.
- Cook starchy foods to golden yellow, not dark brown. This reduces acrylamide and lowers carbonized residue.
How Often Should You Deep Clean the Hidden Parts?
A quick basket wash after every use is essential, but deep cleaning hidden parts should be done on a schedule. The exact frequency depends on how often you cook and what you cook.
- After every use: Wash the basket, crisper plate, and any removable tray with hot, soapy water.
- Weekly: Wipe the heating element, fan guard, interior walls, and basket rim.
- Monthly: Deep clean the crumb tray, handle joints, rear vent, and control panel.
- Immediately: Clean if you see smoke, smell rancid oil, notice sticky buttons, or see visible buildup.
Frequently Asked Questions About Air Fryer Hidden Places
Can water get into the heating element when cleaning?
You should never pour water directly over the heating element or into the interior. Use a wrung-out cloth, a soft brush, or a cotton swab. Moisture should be kept away from electrical parts, screw holes, and the fan motor.
Why does my air fryer smoke even after I wash the basket?
Smoke usually comes from grease on the heating element or fan guard. When those hidden areas get hot, old oil burns and produces smoke. Clean the upper interior and run the air fryer empty for a few minutes to burn off any remaining residue.
Can I use vinegar to clean the inside of an air fryer?
Yes, a mixture of equal parts white vinegar and warm water can cut through grease and neutralize odors. Apply it to a cloth rather than spraying it directly into the appliance. Wipe dry afterward.
Is baking soda safe for air fryer surfaces?
Baking soda is a gentle abrasive that is safe for most non-stick and metal surfaces when used as a paste. Avoid harsh scouring pads, which can scratch the coating.
How do I remove stubborn burnt smell from my air fryer?
Clean the heating element and fan guard, then place a small oven-safe bowl with one cup of water and a few tablespoons of lemon juice or white vinegar in the basket. Run at 350°F for 5–7 minutes. Wipe the interior afterward. This helps lift odors from hidden surfaces.
Conclusion: Deep Clean for Crispier Food and a Safer Kitchen
Your air fryer can only perform well if air can circulate freely through a clean chamber. The hidden places in your air fryer may not be visible every day, but they affect flavor, cooking time, and safety. By adding the heating element, fan guard, basket rim, crumb tray, handle joints, sensor, and rear vent to your cleaning routine, you prevent smoke, rancid smells, and unnecessary wear.
Make a habit of wiping the upper chamber weekly and scheduling a full deep clean monthly. A few extra minutes of maintenance will keep your air fryer running efficiently and your food tasting fresh, crisp, and free of old-grease flavors.