Why Deep Cleaning Refrigerator Coils Is a Non-Negotiable Maintenance Task
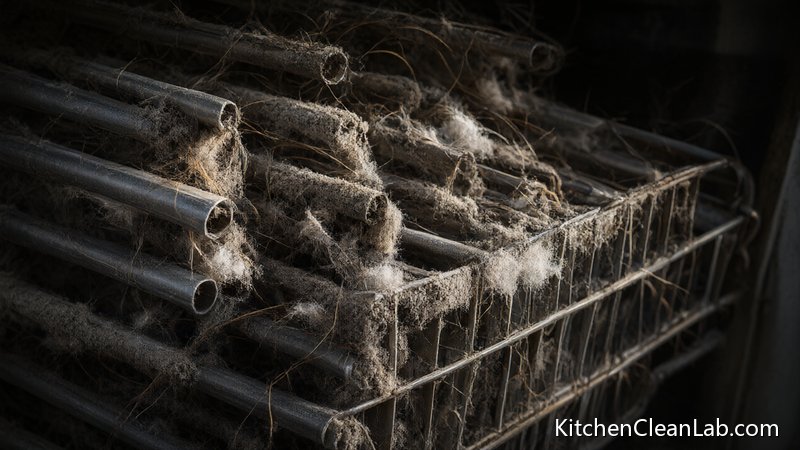
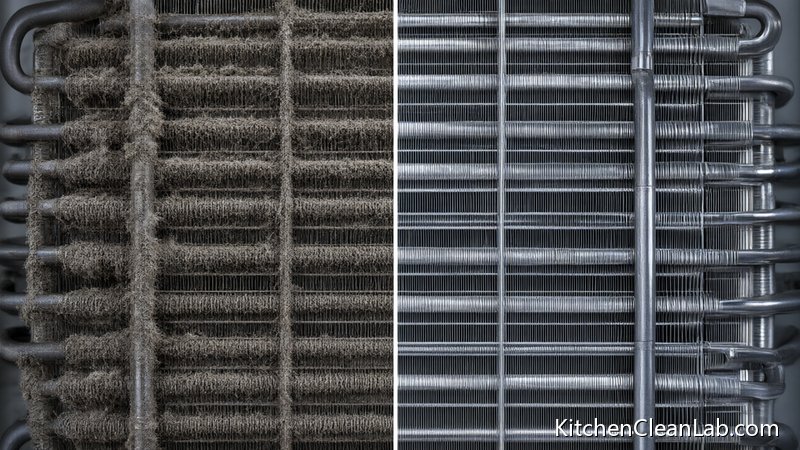
Most homeowners wipe down shelves, toss expired condiments, and organize the door bins, but they rarely think about the refrigerator condenser coils. These hidden components are the workhorses of your cooling system. When they are caked in dust, pet hair, and grease, your fridge coils cannot release heat efficiently. That forces the compressor to run longer and hotter, which shortens the appliance's lifespan and drives up your energy bill. According to the U.S. Department of Energy, keeping condenser coils clean can improve cooling efficiency and reduce energy consumption. If your kitchen has pets, kids, or high foot traffic, deep cleaning refrigerator coils should be on your seasonal home maintenance checklist.
What Are Refrigerator Condenser Coils and How Do They Work?
Your refrigerator removes heat from inside the cabinet and releases it into the room. The condenser coils are the part of that heat-exchange loop that dissipates the heat. You will usually find them either on the back of older refrigerators or behind a front toe-kick grille on newer models. As refrigerant passes through the coils, it condenses from a hot gas into a liquid, releasing heat. If the coils are covered in debris, that heat stays trapped. The result is a refrigerator that never quite reaches its set temperature, runs loudly, and may even develop warm spots that spoil milk, meat, and produce faster.
There are two main refrigerator coil locations: rear-mounted and bottom-mounted. Rear-mounted coils are exposed on the back of the appliance and are common on older or basic top-freezer models. Bottom-mounted coils sit behind a removable grille below the doors. Both types require the same basic cleaning approach, but bottom-mounted coils tend to collect more pet hair and floor debris because they are closer to the ground. If you have a high-end built-in refrigerator, the coils may be sealed inside the machine compartment and require professional service. Always check your owner's manual before you start.
How Often Should You Clean Refrigerator Coils?
As a general rule, clean refrigerator coils every 6 months. Homes with shedding pets, dusty construction nearby, or heavy everyday kitchen traffic should inspect and clean condenser coils every 3 months. If you have never cleaned them, do it today. A four-year-old refrigerator can hide an alarming amount of dust and pet hair even in a spotless kitchen. The best approach is to add this task to your spring and fall deep-cleaning routine, right alongside your dryer vent cleaning and dishwasher filter maintenance. Setting a recurring phone reminder is the easiest way to stay on track.
Tools and Supplies for Deep Cleaning
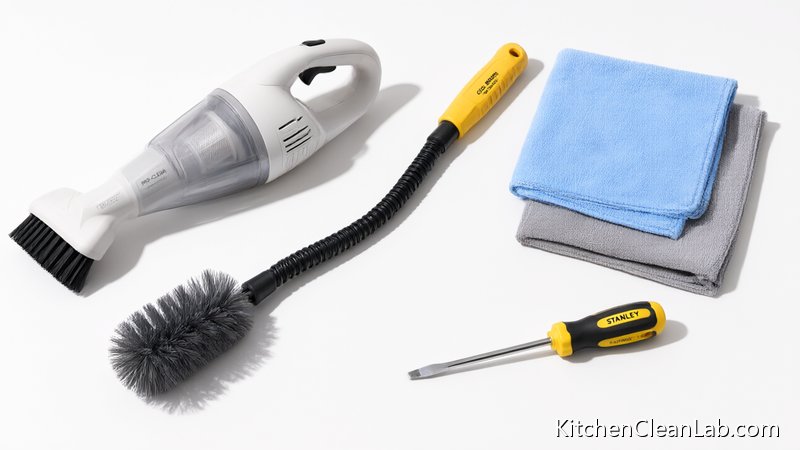
You do not need expensive specialty equipment. Most jobs can be completed in 10 to 20 minutes using tools you may already own. Here is what we recommend:
- Coil cleaning brush – a long, flexible brush designed to slide between coil fins without bending them.
- Vacuum with brush and crevice attachments – a handheld or stick vacuum works best.
- Microfiber cloths – for wiping down the grille and surrounding floor.
- Flathead screwdriver or 1/4-inch nut driver – to remove the base grille or access panel.
- Dust mask and safety glasses – especially if your coils are heavily clogged.
- Drop cloth or old towel – to protect your floor from falling dust and debris.
Step-by-Step: How to Deep Clean Refrigerator Coils
Follow these steps to safely and thoroughly clean your fridge condenser coils. Always consult your owner's manual first, because some built-in or fully integrated models may require professional service. The entire process usually takes less than 20 minutes, even for a heavily soiled unit.
Step 1: Unplug the Refrigerator or Disconnect Power
Safety comes first. Unplug the refrigerator or switch off the circuit breaker before you begin. This eliminates any risk of electric shock and prevents the compressor from cycling while you are working near the coils. If you have a water line connected to the ice maker, avoid pulling or kinking it. If you cannot safely reach the plug, turn off the dedicated breaker.
Step 2: Locate the Condenser Coils
On older refrigerators, the condenser coils are usually on the back of the unit, behind a thin metal panel. You may need to carefully roll the fridge away from the wall. On most newer models, the coils are behind a toe-kick grille at the bottom front. If you are unsure, check the owner's manual or look for a removable grille below the doors. Some high-end models hide coils behind a top panel or use a sealed system that does not require cleaning.
Step 3: Remove the Base Grille or Access Panel
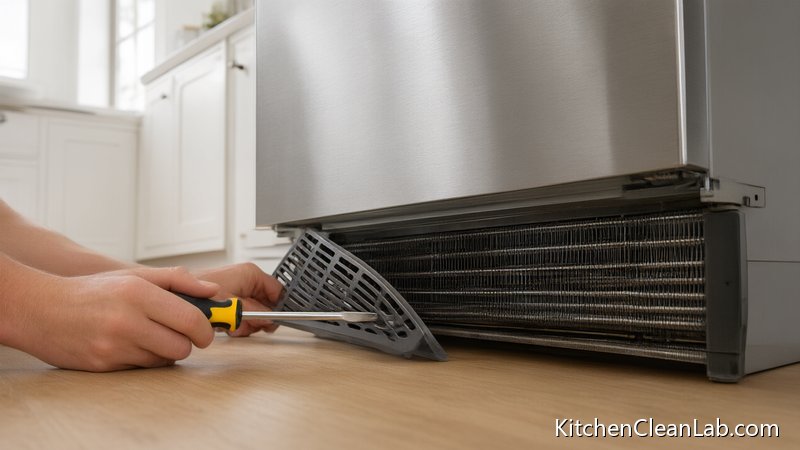
For front-access coils, open both refrigerator doors, place your hands on the ends of the base grille, and push in on the top while pulling up on the bottom. If the grille is secured with screws, use a flathead screwdriver to remove them. Set the screws aside in a small dish so they do not roll under the fridge. If you have a rear-access model, remove the thin panel with a nut driver or screwdriver. Some grilles have plastic clips that release with firm pressure; do not force them if they feel stuck.
Step 4: Vacuum Loose Dust and Debris
Start by using a vacuum with a soft brush attachment to remove as much loose dust, pet hair, and crumbs as possible. Work slowly across the front surface of the coils, the open area behind the grille, and the floor around the appliance. Do not press hard against the coil fins; they are delicate and can bend easily. A crevice tool helps reach tight corners and the space beneath the compressor. If your vacuum has strong suction, use the lowest setting that still lifts debris.
Step 5: Brush Away Stubborn Dirt and Grease
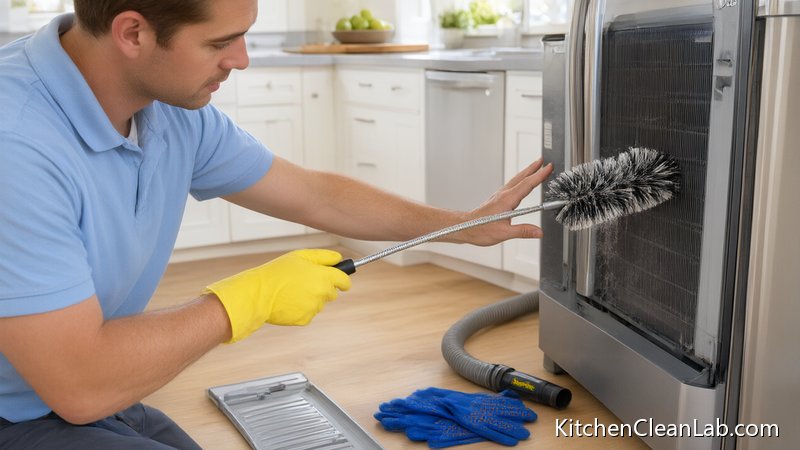
Now switch to a refrigerator coil brush or a soft-bristle brush. Insert the brush between the coil fins and gently sweep from side to side or top to bottom, depending on the coil orientation. This action breaks up the caked-on dust that vacuuming alone cannot remove. If the dust is heavy, wear a dust mask and safety glasses. After brushing, vacuum the loosened debris again. For greasy residue, slightly dampen a microfiber cloth with warm water and wipe the outer surfaces, but never spray liquid directly into the electrical components.
Step 6: Clean the Grille and Floor
Do not reattach a filthy grille. Wash the base grille or rear panel in the sink with warm soapy water, rinse it thoroughly, and dry it completely. While you are down there, wipe the floor and kick area with a damp microfiber cloth to remove dust bunnies, crumbs, and stray pet hair. This simple step keeps the area cleaner longer and improves airflow around the appliance. If the grille has insulation or electrical clips, wipe it with a damp cloth instead of submerging it.
Step 7: Reattach the Panel and Restore Power
Once everything is dry, line up the grille support tabs with the metal clips and push the grille firmly to snap it into place. If you removed screws, return them securely. Plug the refrigerator back in or turn the breaker on. Listen for the compressor to start and confirm that the interior lights are working. Give the fridge 24 hours to stabilize before making any temperature adjustments.
Step 8: Schedule Your Next Cleaning
Set a reminder on your phone or home maintenance calendar to clean the refrigerator coils again in 6 months. If you live in a dusty or pet-heavy home, set the reminder for 3 months. Pair this task with changing your water filter, cleaning door gaskets, and defrosting the freezer if needed. A small recurring calendar alert is the best way to prevent the kind of neglect that leads to clogged coils.
Common Mistakes to Avoid When Cleaning Fridge Coils
- Using a stiff wire brush or high-pressure air – These can bend or puncture the coil fins, reducing airflow and causing damage.
- Forgetting to unplug the refrigerator – Even a small risk of electric shock is not worth skipping this step.
- Spraying water or cleaning solutions directly onto coils – Moisture can damage electrical connectors and promote rust.
- Neglecting the grille and floor – Reattaching a dirty grille simply reintroduces debris to the clean coils.
- Pulling the fridge too far from the wall – If you have rear coils, carefully roll the fridge out without straining the water line or power cord.
- Using a metal brush on aluminum fins – Even a soft metal brush can deform the fragile fins and reduce heat transfer.
Signs Your Refrigerator Coils Need Immediate Cleaning
Not sure if your coils are dirty? Watch for these warning signs:
- The refrigerator runs constantly or feels warm to the touch on the outside.
- Your energy bill spikes without a clear cause.
- You hear a clicking or buzzing noise near the bottom or back of the appliance.
- Food spoils faster than expected, especially in the fridge compartment.
- The back or bottom grille has visible dust, pet hair, or grease buildup.
- The compressor is hot to the touch or the refrigerator cycles on and off frequently.
If you notice any of these issues, deep clean the condenser coils as soon as possible. If the problem persists after cleaning, contact a certified appliance technician.
Pro Tips for Extending Refrigerator Efficiency
Keeping refrigerator coils clean is only part of the equation. These habits help your appliance run better year-round:
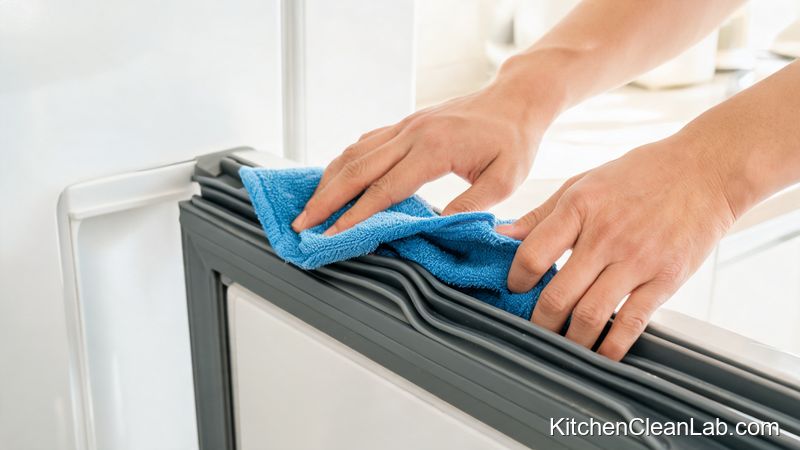
- Check and clean the door gaskets every 3 months. A tight seal keeps cold air inside.
- Keep the refrigerator 2 to 3 inches away from the wall for proper ventilation, especially for rear-coil models.
- Do not overload the fridge; air needs space to circulate around shelves and vents.
- Vacuum the vent openings inside the refrigerator to maintain airflow.
- Replace the water filter on schedule to prevent clogs and poor ice quality.
- Wipe up spills immediately to prevent sticky residue from attracting dust near the base.
FAQ: Deep Cleaning Refrigerator Coils
Can I clean refrigerator coils without a vacuum?
Yes, but a vacuum makes the job much easier. You can use a refrigerator coil brush and a damp cloth, but you will need to sweep or wipe up the dust that falls to the floor. A handheld vacuum with a brush attachment is the most efficient tool for the job.
How do I know if my refrigerator has condenser coils at the bottom or back?
Look for a removable grille at the bottom front of the fridge. If there is no front grille, carefully pull the fridge away from the wall and inspect the back. Your owner's manual will always show the exact location for your model. Some built-in refrigerator models have coils on top or inside a machine compartment that requires professional service.
Can dirty refrigerator coils cause the fridge not to cool?
Yes. When dust and pet hair insulate the condenser coils, heat cannot escape. The compressor works harder, and the fridge may struggle to maintain a safe temperature. In severe cases, the compressor can overheat and shut down, leading to a complete cooling failure.
How much money can cleaning refrigerator coils save?
The exact savings vary, but maintaining clean coils can reduce the workload on the compressor and help lower energy consumption. According to home energy experts, simple refrigerator maintenance, including coil cleaning, can improve efficiency and extend appliance life. Even a modest improvement in runtime can add up over a year.
Should I wear a mask when cleaning refrigerator coils?
It is a good idea, especially if your coils are heavily coated in dust, pet dander, or construction debris. A dust mask and safety glasses protect you from inhaling fine particles while brushing and vacuuming the coils.
What is the best brush for cleaning refrigerator coils?
A long-handled refrigerator coil brush with soft nylon bristles is ideal. It reaches deep between the coil fins without scratching or bending them. Avoid stiff wire brushes, metal scrapers, or anything with sharp edges. Many appliance brands sell a dedicated coil brush that is inexpensive and effective.
Final Verdict: Keep Those Coils Clean
Deep cleaning your refrigerator coils is one of the easiest, highest-impact maintenance tasks a homeowner can do. It takes less than 20 minutes, costs almost nothing, and can save you from an unexpected repair bill. Whether your coils are behind a toe-kick grille or on the back of an older unit, the process is straightforward: unplug, locate, remove the panel, vacuum, brush, clean the grille, and reassemble. Do it every six months, or every three months in dusty homes, and your refrigerator will run more efficiently, keep food fresher, and last longer. If you have been avoiding this chore, let this guide be your push to grab a coil brush and get to work.